Blog Inspiration

Showing posts with label crafting. Show all posts

Sunday, December 22, 2013

Christmas Crafts

We are officially on winter break and it feels SO NICE to relax and sleep in! I wanted to share some of the fun activities we worked into the last week of school. We had a lot of testing the last two weeks of school, so after reviewing, and testing, we let the kids relax and have fun! Here are some of the crafts I did in my class:

One day we made these snowman I found on TPT (for free!) and put on Frosty the Snowman (which I found on YouTube). Granted, it's intended for K-2, but it kept them busy, was simple enough to do without a lot of instructions, and was something fun while watching a movie. Here's how some turned out!
Too cute, right?

Love the creative eyes

This student added eyes
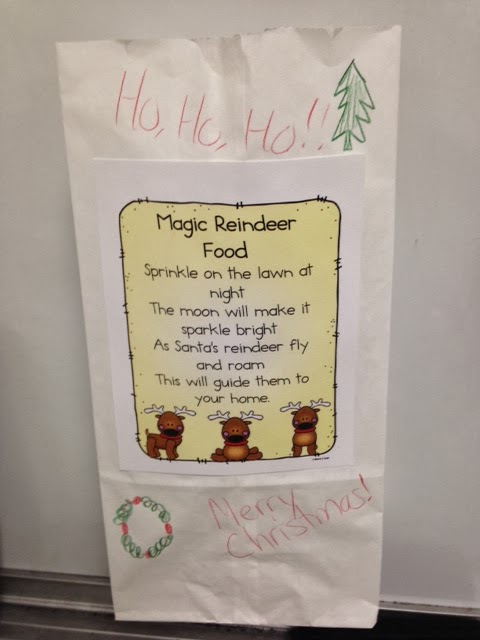
The next day, we did another craft. This time we made Reindeer Food in little white paper bags. I found this freebie label on TPT as well and printed enough copies for every student to have one. They glued them onto the bags and then decorated the bags with colored pencils. Then I worked with one table at a time to scoop sunflower seeds, oatmeal, and glitter into their bags. My only regret is not having more "ingredients" in the reindeer food and not taking advantage of the learning opportunity to use fractions with measuring cups. Oh well! Still turned out cute. I told the kids to sprinkle it on their lawn on Christmas Eve so the reindeer can have a snack while Santa delivers presents!

Finally, the little treat I made for the kids this year was something I found on Pinterest. It was simple and cheap, which, as a first year teacher, is a must! Just bought a GIANT bag of Jolly Ranchers, little baggies, ribbons, and printed out the tags. I put about 5 jolly ranchers in each bag, tied them up with ribbon, added the tag and voila! Done.
So pretty! And so simple!
So those are a handful of crafts I used this season. I love that teaching gives me the chance to really enjoy holidays all day everyday! You better believe the Christmas Pandora station was playing everyday the three weeks between Thanksgiving break and winter break! Overall, I'm just so relieved to be halfway through my first year. Time for a break and some sunshine =]

Tuesday, August 6, 2013

Gator Classroom

People. I've been in the classroom for two days now and it has been a WHIRLWIND. It's like everything I learned rushed out of my head when those kids lined up at my door Monday morning. Talk about panic.

BUT

the good news is this week we are on the short day schedule (7:30-2) and we have an hour long enrichment block where the kids go to Watoto (which I mentioned in this post). I am definitely feeling overwhelmed, but I have a lot of support through TFA, my 4th grade team, my school, UF teaching friends, and my roommate! I also have to remind myself that Rome wasn't built in a day and I can't be perfect day 1.

I do want to introduce my classroom in all it's Florida glory. Mind you, it's a work in progress. I still need some rugs, some student work, and to put up my Florida posters and gear, but hey, it's better than the last post! Enjoy =]
Front door, word wall, and class library 
Close up of the word wall with writing posters above.
Eventually I want a table to use for writing underneath it.

My reading corner, before the cozy rug that's coming!

Yes, that is a dollar store blow up alligator

Best part of my room! Still need to add my little individual gators!
The front of the room

Good work bulletin board, calendar, and chart paper 

My school-wide rules and areas for the daily objective and standard

Teacher area and Gator of the Week

My little corner =] Especially love my class picture from last year. Miss them!

Love love love these pom-poms! Made of tissue paper and inspired by this

My SMARTboard. A little bland... maybe some Gator curtains??

My storage area and "take a break" chair. Needs a rug and some color....

Desks in pods of 4 (hey Kagan!)

Swampy name tags

For my front door


Behavior punch cards as my classroom incentive.
Different colors for different periods (three 4th grade classes)

Rewards for punch cards (taken from here)
Also taught them the "It's great to be a Florida Gator" chant and have attempted "Na na na na na GO GATORS!" but it was a bit of a struggle. I'll keep you updated. We were also misidentified as Florida State today. NOT OK.

Tuesday, May 28, 2013

Winding Down

Wow my internship year is officially coming to a close and I am moving to Memphis in four days. My last day at school was Friday and I'm going back tomorrow for the end-of-the-year party and to say goodbyes =[ This is by far the most attached I've ever been to a class before (I've been with them since the beginning of October!) and they were so sweet to me on my last day. They had their big play (The Frog Prince Continued) and then we had a surprise ice cream party (yum!) with lots of homemade cards and gifts from my teacher, the teacher next door, and the parents. I feel so loved! I gave each of my kids a personal note and a crazy straw with Kool-Aid that I saw on Pinterest.

So cute right? 
This weekend was chock full of family and friend time. We had a big BBQ with my dad's family on Saturday and then with my mom's on Sunday. I was basically out by the pool from Friday when I got home through last night. It was so fun spending time with everyone and hanging out with my friends. I am definitely going to miss everyone and I feel like I did 5 years ago when I left home for UF [sigh].

My crazy friends
So this is my ONE week of summer and boy is it a busy one. I'm packing up twice: one set of stuff/boxes for me to take in my car on Saturday and one set of stuff/boxes for my mom to drive up in July. I'll be staying the dorms at University of Memphis from when I drive up there this weekend until July 19 and then I'll be moving into my new place with Meghan! We signed a lease [hooray!] and my mom will drive up the weekend in July I move out of the dorms and into the apartment.
Oh hey, University of Memphis
I'm also working on my last online class (which ends in late June), getting everything set to move, trying to visit with EVERYONE, and, oh ya, relaxing during my week of summer.
The beach house a bunch of us rented two weekends ago.
Heaven.
That's a bit of an update with me. I'll be keeping my blog because I'm teaching fourth grade again next year, but it will no longer be an intern blog. It'll be a first year teacher blog!

Thursday, February 14, 2013

Love is in the Air

Happy Valentine's Day, friends! I love love love celebrating holidays with my babies. They are always so excited about every little thing that we "adults" often overlook. It's so fun to dress up and do holiday themed activities and then [drumroll] EXCHANGE VALENTINES AND EAT CANDY!!! If I had a nickel for every time today someone said "When are we gonna do valentines??" I would be able to afford a treadmill to burn off all the chocolate they gave me. See?

My collection of chocolate- so spoiled!
Tulips! They just took over our desk! 
Each of the students brought in decorated shoeboxes and had a BLAST walking around the room and passing out their valentines. Then they spent another half hour reading every last note (and sampling the treats). One of the boys made homemade cards with personal messages to every child. It was so stinkin' sweet I about died.

So what did the kids get from me? Funny you should ask! I found a fantastic blog post through Pinterest about candy-free valentines and gave them glow-stick bracelets! It led me to this blog, which had printables already set up for you. All I had to do was buy glow-stick bracelets (15 for $1 at Target!) and cardstock to print out my valentines. Then I cut them up and signed each one. Boom! Quick and cheap, but my kiddos loved them!! 
Love how easy this is 
I "accidently" snapped like 6 glow-sticks while attaching the bracelet connectors.
Party time in the living room!

Done!

Confession: This was just me practicing how to use my timer on my new camera.
Good news: it works!
So that was my Valentine's Day! After seminar with my supervisor and fellow interns, I'm changing into sweatpants and ordering chinese with my momma while we watch girly tv. This is how Valentine's Day SHOULD be, ladies and gentlemen.

Sunday, November 18, 2012

Prefix and Suffix Flipbooks

Hey everyone! How crazy has the last week been for you? It's been really crazy for us! We had a short week (only 4 days) and SO MANY OBSERVATIONS. My mentor teacher had an observation on Tuesday and one on Thursday and then she observed me on Friday. We also had a Thanksgiving feast with our kids on Friday with vegetable soup in the crockpot, cornbread, fresh fruit and berries, and cookies. So yummy!

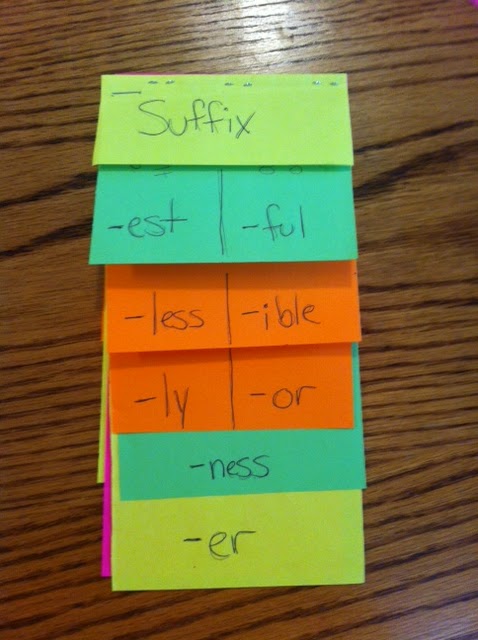
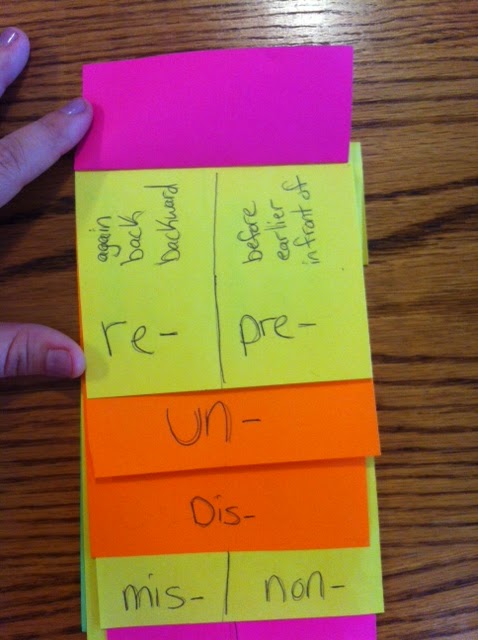
One lesson I did this week was about affixes- prefixes and suffixes. This is important for fourth grade to learn new words they come across in their reading. We used flipbooks to teach the affixes. Have you ever seen these?
One side of the flipbook

Reverse side of the same flipbook
These are actually two flipbooks stapled back to back. This is how you make them:
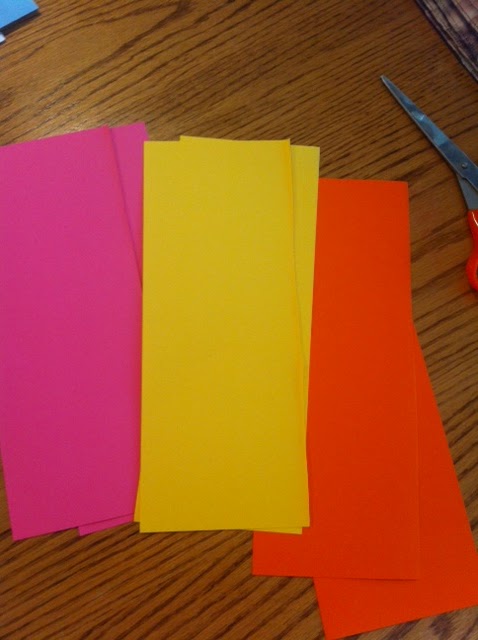
1) Get some colorful paper- we had three pieces of paper per student (all different colors).
2) Cut each piece of paper in half lengthwise.
So much paper involved
3) Fold the pieces of paper different lengths, like the picture below. We kept one as a model while folding and folded the rest to match it.
Pictures are really needed to explain this part!
4) Stack the pieces of paper, one inside another, like a Russian doll, and then staple across the top.
Booyah
5) Staple two books back to back so you can do prefixes on one side and suffixes on the other.

Once the books were made, each student wrote a prefix (or suffix) on each flap with the definition under the flap above. We did all of these together. Then they went to different spots around the room to read their independent books. As they read, they had to find one example of each in the book and write that, along with two examples they could think of, under the affix. They had a total of three examples per affix and then we went over everyone's and talked about what examples we found.
Sometimes we fit two on one flap.
The examples for mis- and non- are on the yellow.
The examples for un- are on the other side of the orange.
I love these flip books! They're great resources for the kids to keep and a lot of fun to make. I just used the list of affixes from the standard for Florida, but you can do whichever ones you need. I would recommend making them for the kids ahead of time and then having them fill them out. Also, I wrote sideways, but it would probably be easier to write normally. Live and learn, right?

This week we only have two days of school! Two days of school and five days off? Can we do this every week???

Wednesday, October 31, 2012

Happy Halloween!

It's Halloween! One of my absolute favorite holidays (it's basically glorified dress-up, which is a thespian's DREAM). Our school had a really neat Literacy Parade where everyone dressed up as a character from a book and we all had a lot of fun with it! Some ideas from the teachers:

  • Pinkalicious (and purplicious and silverlicious and goldilicious)
  • A Bad Case of the Stripes girl
  • The 7 dwarfs (sneezy, sleepy, grumpy, etc.)
  • The Giving Tree
  • Sleeping child from Polar Express
And, of course, Ginny Weasley from Harry Potter! 
Gotta love mirror shots, right??
I put together this costume two years ago when the 7th movie came out and I used it again today. Here's how I did it if you want your own Harry Potter themed costume without paying an arm and a leg:
  • Start with what you have! I already had the black skirt, black tights, and black shoes. Win!
  • I bought a simple red tie from Walmart and painted yellow stripes on it with whatever paint I had on hand. Look at the characters online and you can see their ties have two thick stripes, then one thin stripe.
Use the pattern on the tie to help you keep lines straight!
  • I bought a child's white button down from Walmart (school uniforms, baby!) for like $7 and ironed on the Gryffindor crest. Just get some special iron-on transfer paper, like the kind here, and follow the instructions after finding the image you want online!
  • The cloak was the most complicated part of this costume because I could NOT find one I liked in stores. I found a great tutorial on About.com. If you know how to use a sewing machine at all, you can make this! It was really easy and looks and feels really nice and expensive. I added the Gryffindor crest to this too by using iron-on transfer paper. Make sure you get the type for dark fabrics. I also bought two little buttons and sewed them on near the top so I can actually close the cloak with a ponytail holder! 
The cloak looks awesome when you walk quickly and it flutters behind you.
Magical.
  • Don't forget the wand! I painted a dowel rod black and added glitter. Lots of glitter. 
TADA!! Putting together costumes is so much more fun than buying one and I had a lot of fun with this one! Happy Halloween!!

Sunday, October 28, 2012

Something is Not Right

Hello friends! Don't be alarmed by the title of this post, it's referring to Madeline by Ludwig Bemelman. Do you remember the story? The twelve little girls in two straight lines, the littlest one was Madeline! Why am I talking about Madeline, you ask? Well, one of our little ones had to get his appendix out =[ and ALL I could think about was Madeline. In the story, she gets her appendix out and gets bunches of toys and a cool scar, which makes the other girls want to get theirs out too!
Love using literature to connect real life situations
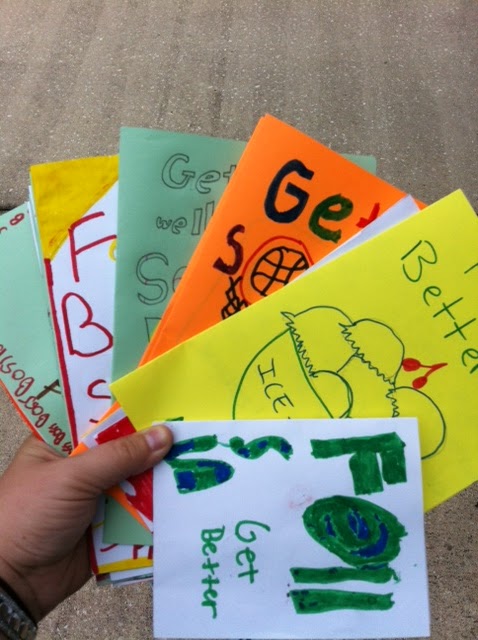
I told the kids about their friend and then read the book aloud while they made cards at the end of the day Thursday. It was a nice way to end the day and I know our sweet patient will love getting cards from all his classmates.

The book was also a really nice way to introduce surgery to the kids and we then had the opportunity to talk about being under anesthesia, having a scar, getting toys and/or ice cream, and how long until their friend was back in school.

Look how colorful the cards are! Didn't they do a great job?!
Hot topic with the kids: should you draw an appendix on a card or would that upset him?
What does an appendix even look like? They decided NOT to draw the organ, btw.
The kids are probably going to be a bit let down that he won't have a big ol' scar like Madeline did, but times have changed, kiddos! Homemade cards make everything better, though, and I can't wait for our sweet boy to be back with us this week =]